I researched how to make homemade beeswax candles a few years ago when I learned about the toxicity of the majority of candles sold on the market. I was intrigued on how I could simply make this candle and there were so many benefits to burning beeswax! Beeswax pour candles were the simplest process for me to make candles, but there are other methods like dip candles and using sheets of beeswax to wrap a wick.
Benefits of Beeswax Candles
Some of the benefits beeswax candles offer compared to other types of candles:
1. Cleaner Burn: Beeswax burns more cleanly than paraffin wax, producing minimal soot. This cleaner burn is beneficial for indoor air quality.
2. Natural Scent: Beeswax has a natural, subtle honey scent. This natural fragrance is pleasant and doesn’t require artificial additives or fragrances.
3. Non-Toxic: Beeswax is a natural and renewable resource. It doesn’t release harmful by-products when burned, making it a non-toxic and environmentally friendly choice.
4. Longer Burn Time: Beeswax candles typically have a longer burn time compared to paraffin candles of the same size. This makes them more economical in the long run.
5. Negative Ion Emission: Beeswax candles release negative ions when burned. These ions can help neutralize pollutants in the air, potentially improving indoor air quality.
6. Hypoallergenic: Pure beeswax is hypoallergenic and suitable for individuals with allergies or sensitivities. It doesn’t produce the same allergic reactions as some synthetic candles.
7. Aesthetically Pleasing: Beeswax has a natural golden color, giving the candles a warm and inviting appearance. This makes them aesthetically pleasing for various settings.
A Few Things to Consider
A few things to consider when making beeswax candles:
*Choose a natural (all cotton or hemp) wick for cleaner burning.
*The width of the wick and the width of your candles matter to prevent burning too quickly and tunneling. Check out this blog for more information! They helped me understand how to pick a wick!
*It is best to get wax from a local beekeeper, search online for beekeepers in your area. If you can’t acquire any wax there, amazon has many options!
*When approximating how much wax you need to fill your candles, approximate about 10% more. From a pound (16 ounces) of wax, I was able to make four 4 ounce candles.
*Use a designated or disposable heat safe container and stir stick (I use disposable wooden chopsticks) to stir your wax because it is very difficult to clean wax off.
*Line surfaces with newspaper or parchment paper. It can be difficult to clean drips of wax off your work surfaces.
*I recommend warming your oven to about 200F for a few minutes. Shut off the oven and allow your candles to cool and harden in there. This will help prevent cracking and pulling away from the sides.
Items recommended to make homemade beeswax candles:
Sky Organics Organic White Beeswax Pellets
Ball 4-Ounce Quilted Crystal Jelly Regular Mouth Jars
EricX Light Organic Hemp Candle Wicks, 100 Piece 8″ Pre-Waxed by 100% Beeswax & Tabbed
EricX Light Candle Making Pouring Pot, 4 pounds (I love this for easy melting and pouring!)
Assark Glue Gun
Glue Dots, Craft Dots, Double-Sided, 1/2″
Whitmor Set of 50 Wooden Clothespins
If you enjoyed working with beeswax, check out our recipe to make Wood Butter!

Homemade Beeswax Candles
Keep the screen of your device on
Ingredients
1 pound 1 beeswax block or pellets
4 4 candle wicks
4 4 jars
- Items needed
double boiler
stirring utensil
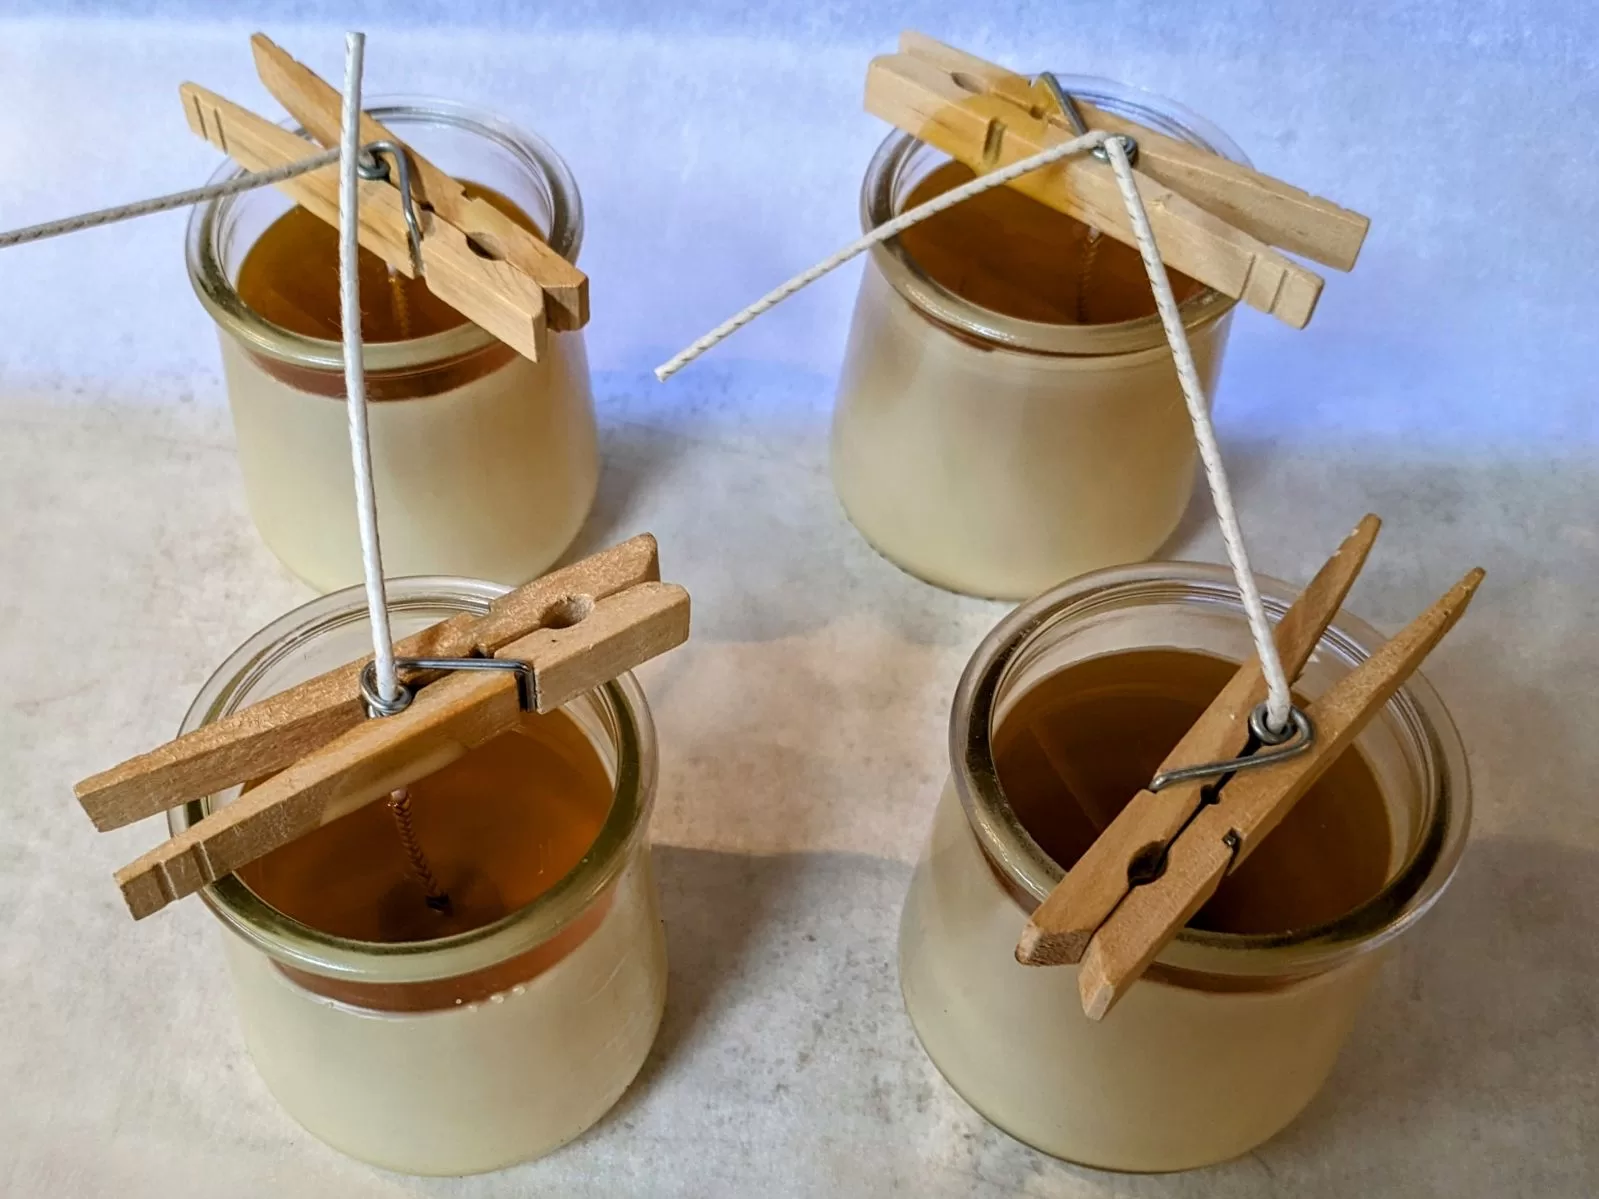
clothes pins (wick holder)
Directions
- Prepare Jars:
Place wicks in the center of each jar.
Use a hot glue gun, glue dots, or a bit of melted wax to secure the wick to the bottom. Use a wick holder, chopstick, or clothes pin to ensure the wick is centered in the jar. - Set Up Double Boiler:
Fill the bottom of the double boiler or pot with a rack with water and bring it to a simmer.
Place the beeswax in the container of your melting vessel/wax pitcher. - Melt the Beeswax:
Allow the beeswax to melt slowly.
Beeswax typically melts around 145-147F. - Pouring Wax:
Once the beeswax is completely melted, carefully pour it in the prepared jars.
Leave about half an inch from the top to prevent spillage. - Cooling:
Allow the candles to cool completely. The beeswax will solidify as it cools.
Optional, but recommended: Warm your oven to about 200F for a few minutes.
Place candles on a baking sheet and allow the candles to cool slowly in the oven to prevent cracking and shrinkage.
If there are sinkholes or cracks, you can do a second pour on top to top them off. - Trim the Wicks:
Trim the wicks, leaving about 1/4 to 1/2 inch above the surface of the beeswax. - Curing:
Let the candles cure for a day or two before lighting.
Did you make this recipe?
Tag @homesteadyall on Instagram and hashtag it with
Leave a Reply